How to create your first VM in Azure in 10 steps!


In this post I want to show you how you can create the Virtual Machine in Azure step by step. You can do that with wizard or different methods however I wanted to create every single item separately. That helps us to see how we can configure VM.
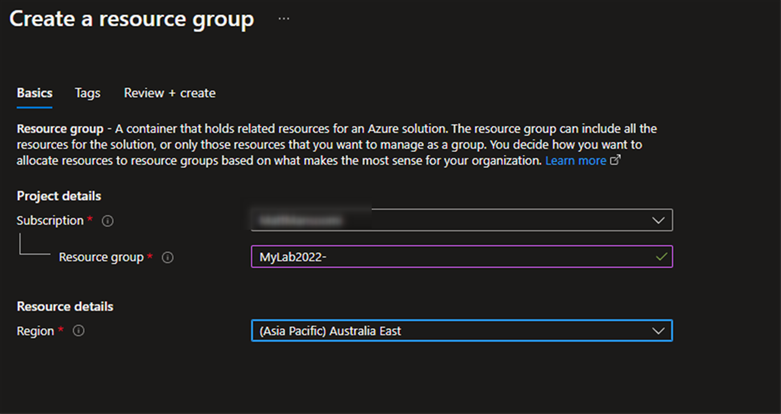
1- Create the resource group:
I’m going to create new resource group for this, as you may know it is a manageable item that is available through Azure. Virtual machines, storage accounts, web apps, databases, and virtual networks are examples of resources.
Be aware we need to create all of those items in the same region. I choose (Asia Pacific) Australia East, you might want to choose different region.
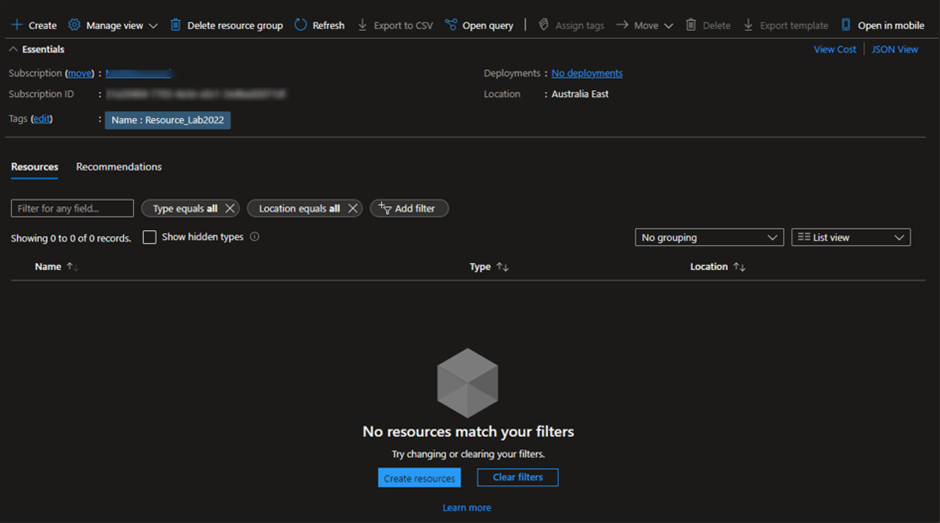
After creating the resource, you see 0 records for this resource, in next steps we’ll add Virtual Network, Virtual machine, Public IP and NSG.
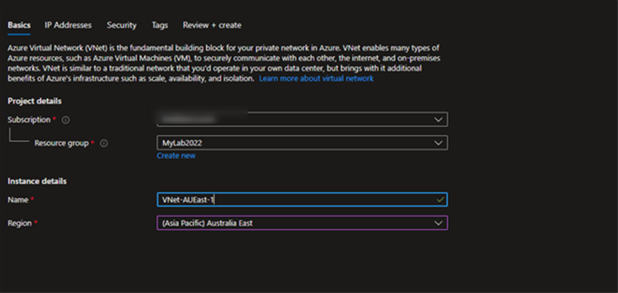
2- Create Virtual Network (VNet):
In the first step we need to create VNet, Choose the name and the resource name which have created in the last step.
In the second tab (IP Address) I’m going to delete IPv4, after this subnet also will be deleted and then we’ll create them manually.
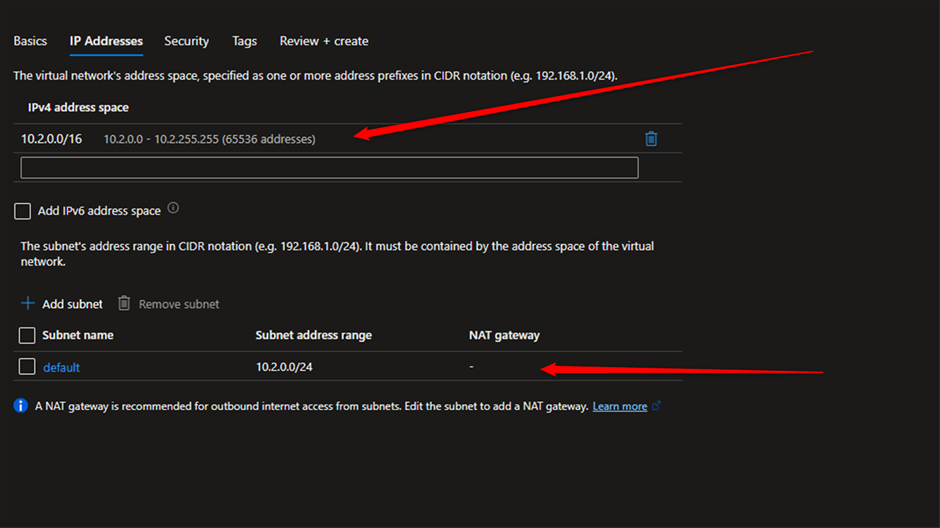
As I mentioned earlier, I create new IPv4, please see the format in the below screenshot. As you can see in the below after deleting the IPv4 we need to create subnet as well.
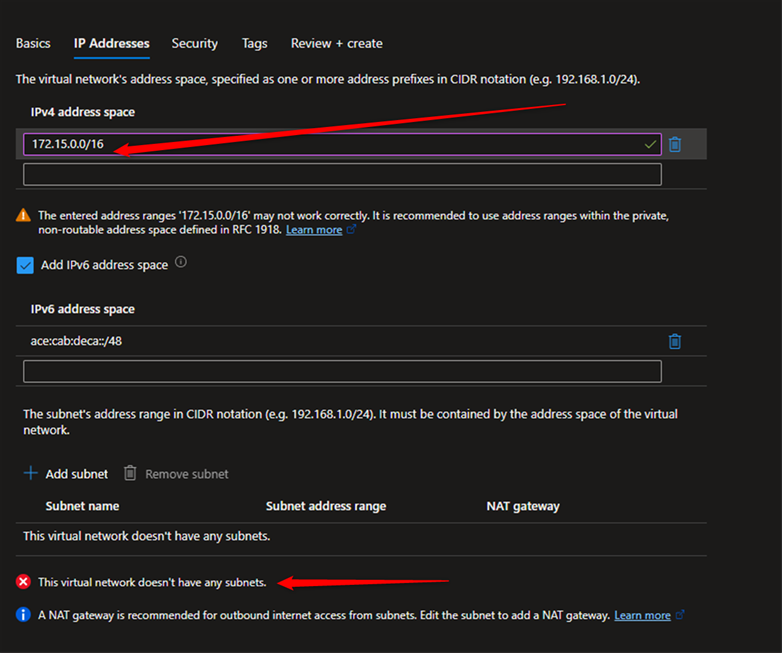
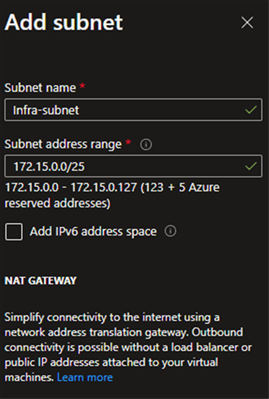
For creating the subnet choose the name and Subnet address range, as my IPv4 was 172.15.0.0/16 I choose the following IP for my subnet, for now leave the other section and save this.
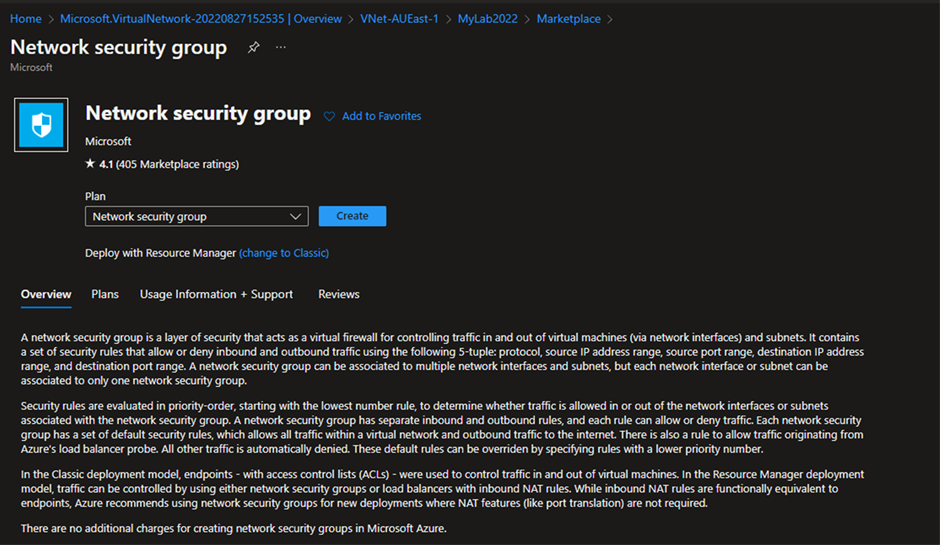
3- Create Network Security Group (NSG):
NSG has critical rule, that enable you to filter the type of network traffic that can flow in and out of virtual network subnets and network interfaces. See the referral link for more details if you like.
Like previous steps only type the name in this case “Network Security Group” then create it. It takes only a couple of minutes.
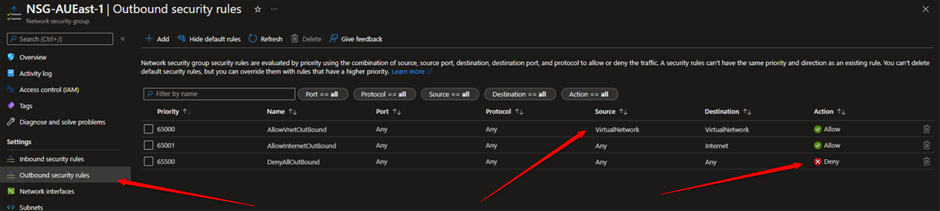
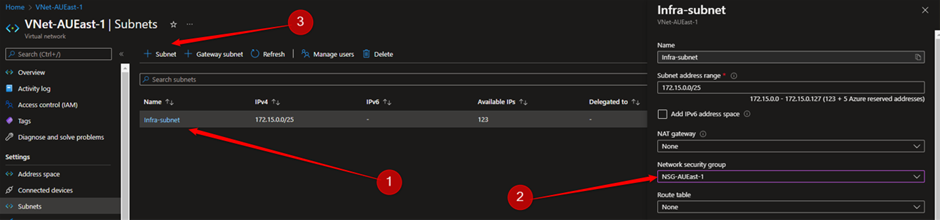
Now go the VNet we have created earlier, from the left side go to Inbound and Outbound security, as you see there are a few rule and only traffic between VNet to VNet and to the Internet allowed.
Next go to the resource group and choose the VNet that we created in step1, select the subnet and like the following screenshot create new subnet, please be aware we paste the IP that we choose earlier.
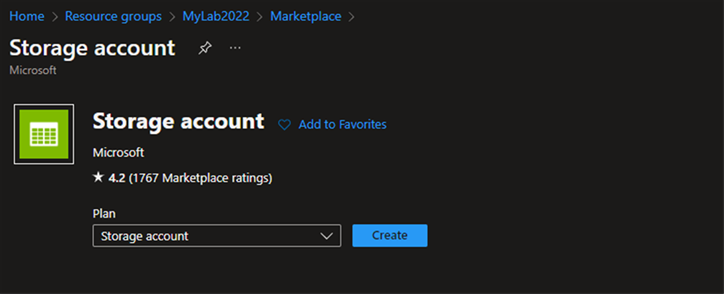
4- Create new storage account.
Again, from the Resource group find “Storage account” and create it.
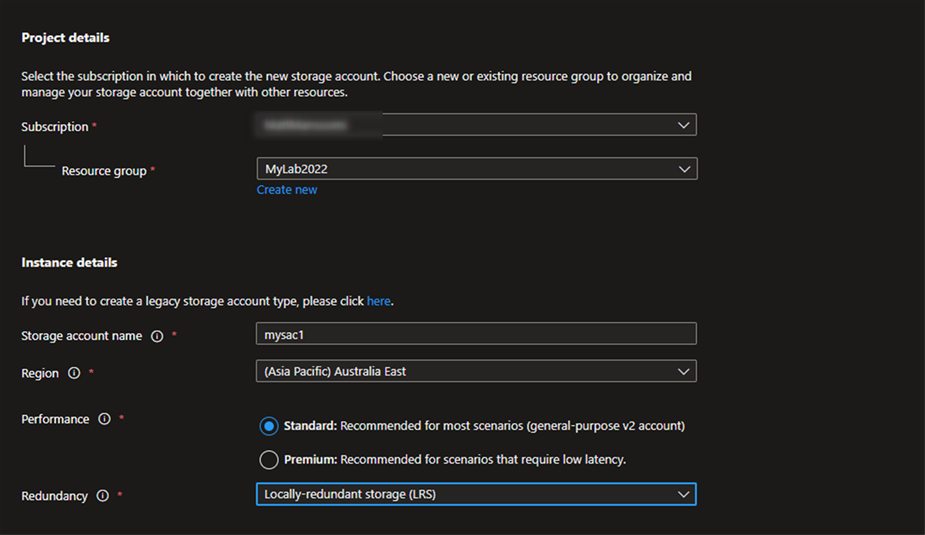
Like you see in the below screenshot I choose Standard and LRS for redundancy. As I explained earlier you need to choose same regions for all of these.
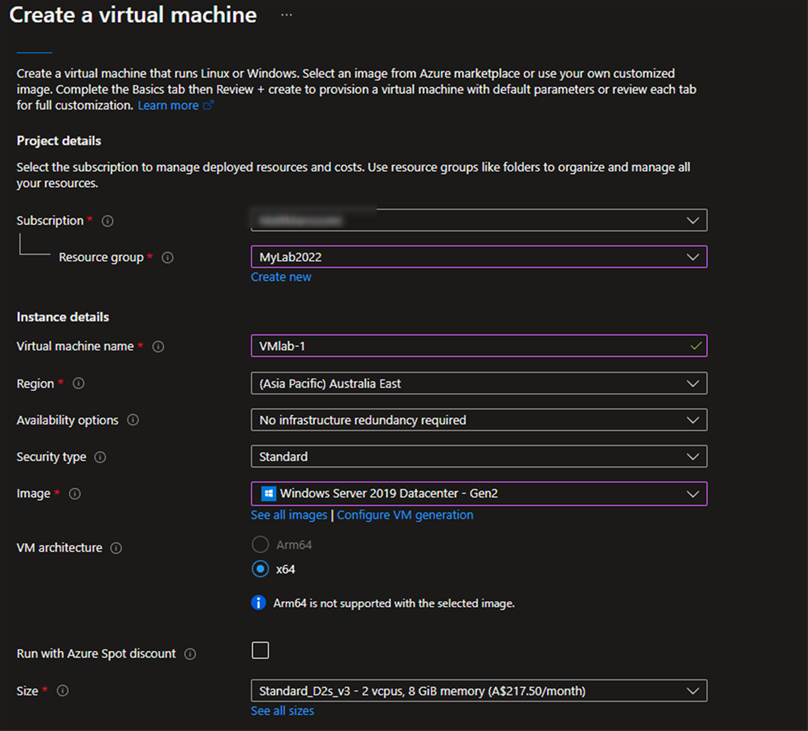
5- Create new VM.
Now time to create the Virtual Machine in Azure. We have created everything before; in the first step you need to choose the unique name and general details. I want to have Windows Server 2019.
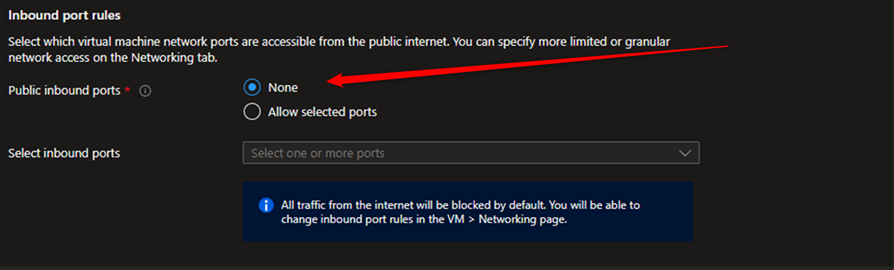
The next step I want to disable Public inbound, so I choose “None” for Public inbound ports.
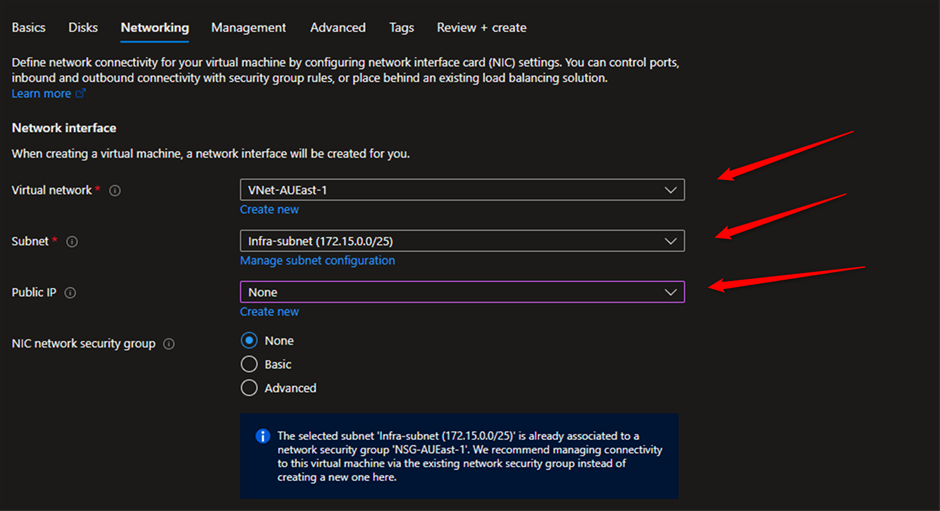
In next step and networking tab I choose “VNet” and “Subnet” that I’ve created earlier and select “None” for Public IP. I’ll configure this part later.
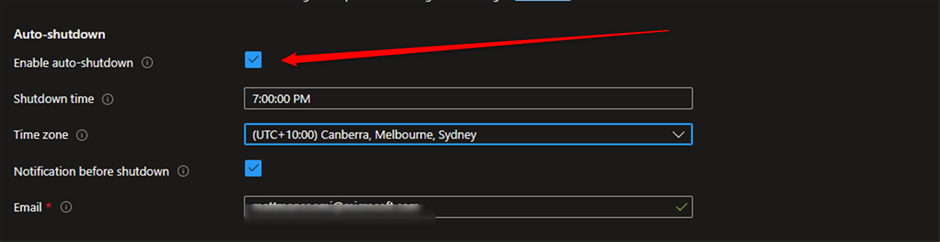
You can always get back and modify this part however I’d suggest enabling auto-shutdown and let your VM shutdown whenever you don’t need that. For some people or business that they do not use the VM all the time that option can be useful.
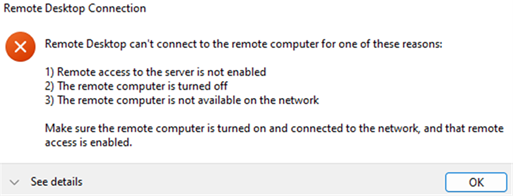
So far if you try to connect to the VM you’ll get the following error message. We still need to do a few more steps.
6- Create IP address
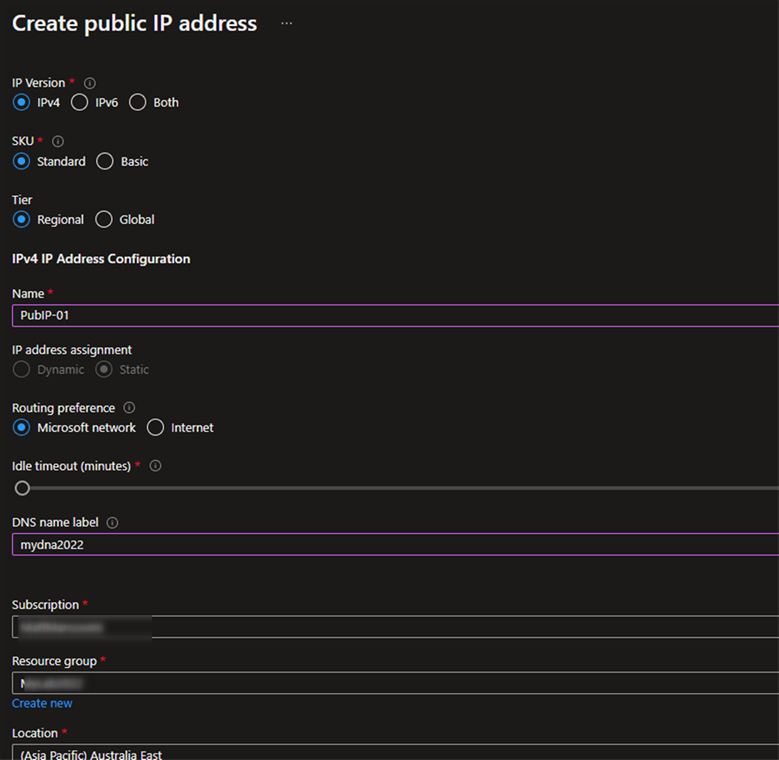
From the resource group, create Public IP address. In the following steps I’ll tell you how you need to configure that.
Choose the name and standard setting like the below.
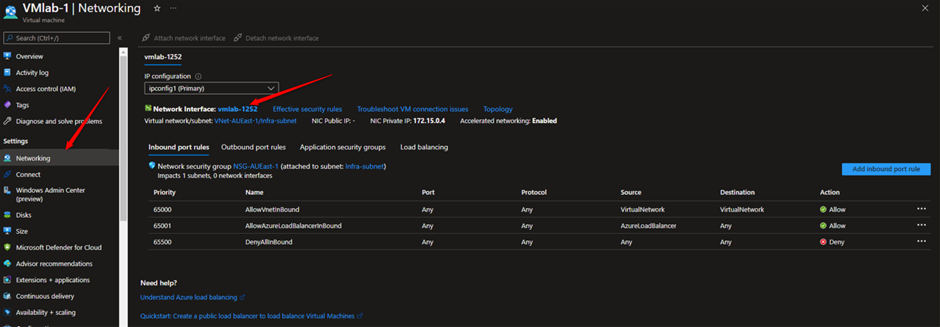
7- Add Network Interface in VNet setting.
Again you need go to the VNet that we created earlier, choose “Networking” then click on Network Interface.
8- Network Interface:
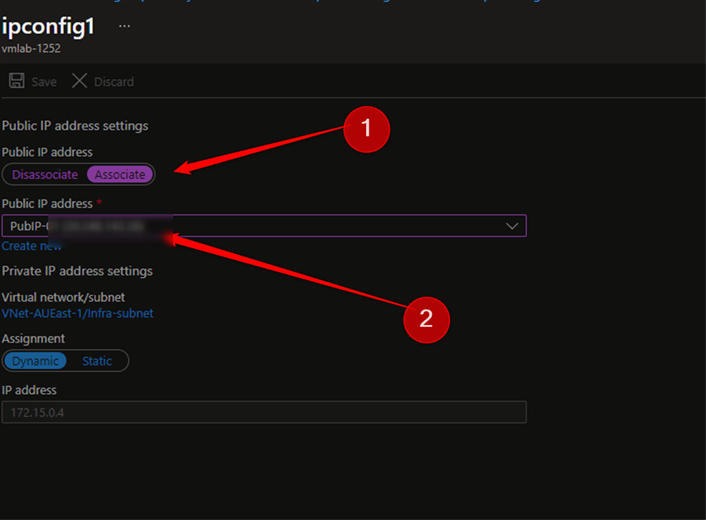
From Network Interface and IP configuration select the IP address that we have created in step 6.
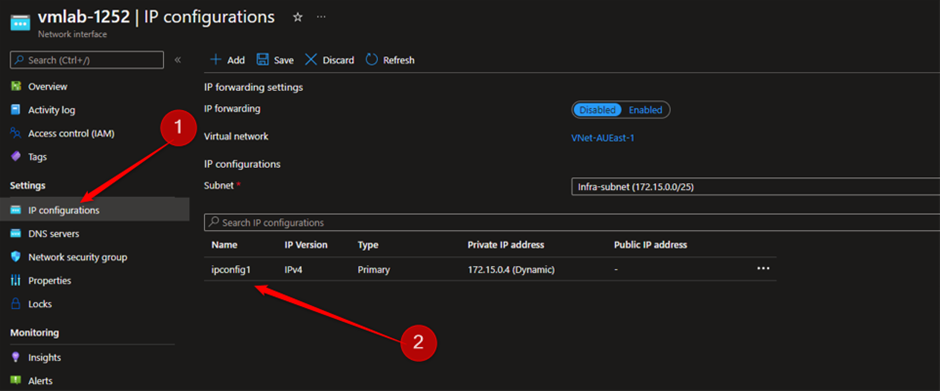
Then like the following screenshot select the IP address and save it, that takes a few minutes.
After this we can connect to the Virtual Machine? If you try you can find that you still get the error message, we only need to do one more step.
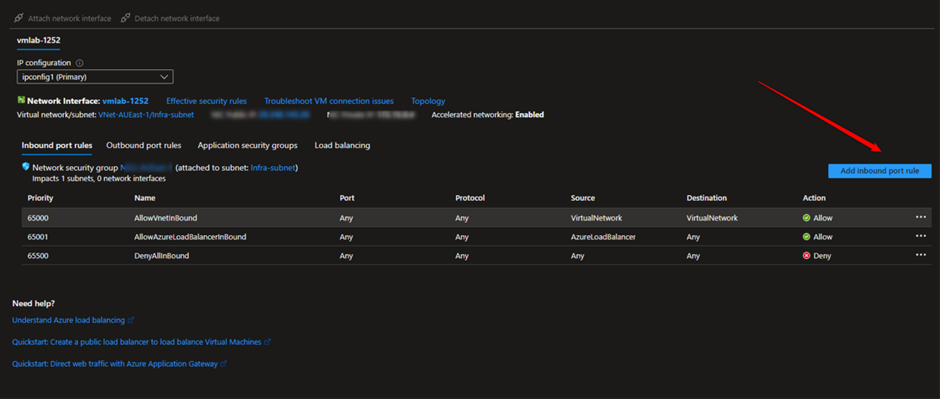
9- Add Inbound port rule.
Go to the VM and choose “Networking” then like the following screenshot click on “Add inbound port rule”
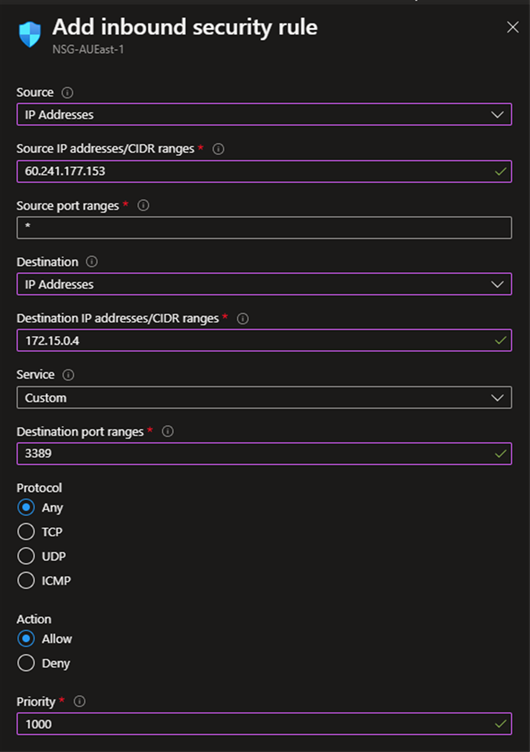
You need to select the source (Your local computer) and Destination (The VM Private IP) the destination port for RDP is 3389.
The easiest way to find what’s your local IP address is google “what is my IP address”, for the VM also you can find it from “Overview”
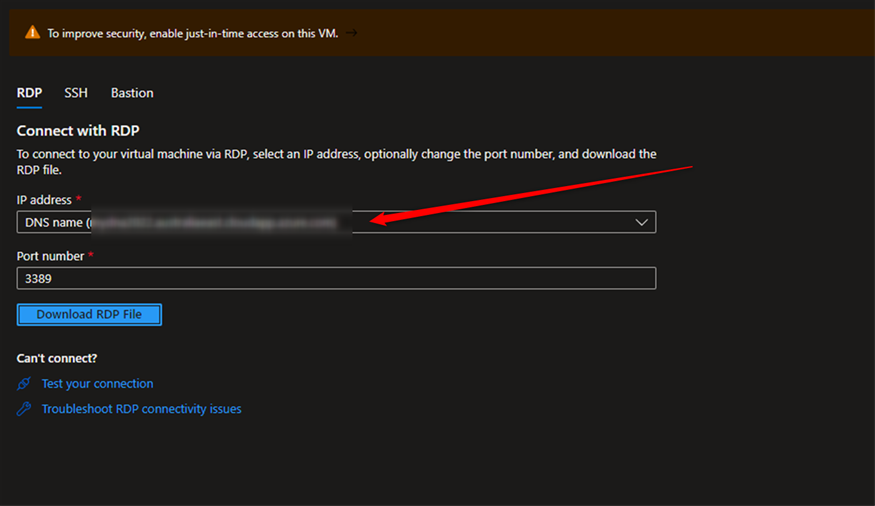
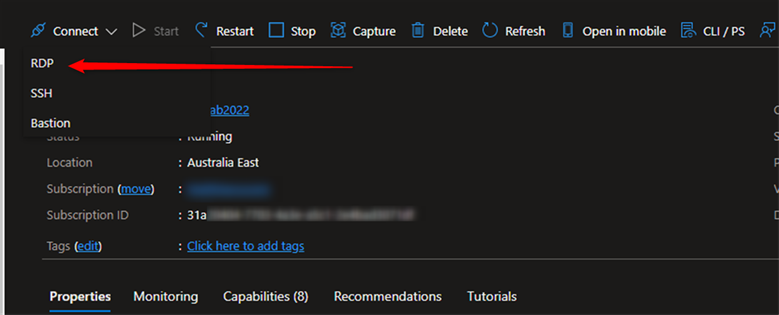
10- Connect to the Virtual Network.
We almost there, we have created VNet, Network Interface, VM, Public IP, NSG and all other required configuration, you can go to the Virtual Machine and from Connect download the RDP. With username and password that you choose for VM you can login…
Note:
Please be aware that this guideline is only can use for your lab and if want to use it for Production you may need to use different configurations.
Also after this post I’ll delete all resources from my subscription.