Connect to Managed Instance with Public End Point


If once you tried to connect to managed instance, you got the below error message, this post might help you to fix the issue.
A network-related or instance-specific error occurred while establishing a connection to SQL Server. The server was not found or was not accessible. Verify that the instance name is correct and that SQL Server is configured to allow remote connections. (provider: TCP Provider, error: 0 - A connection attempt failed because the connected party did not properly respond after a period of time, or established connection failed because connected host has failed to respond.) (Microsoft SQL Server, Error: 10060)
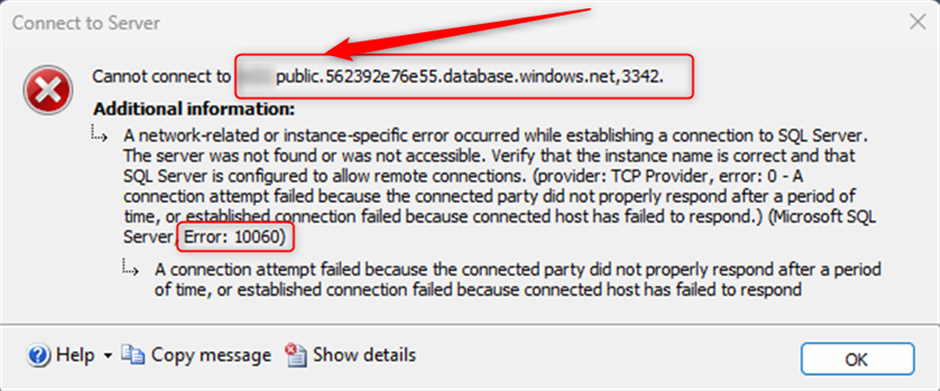
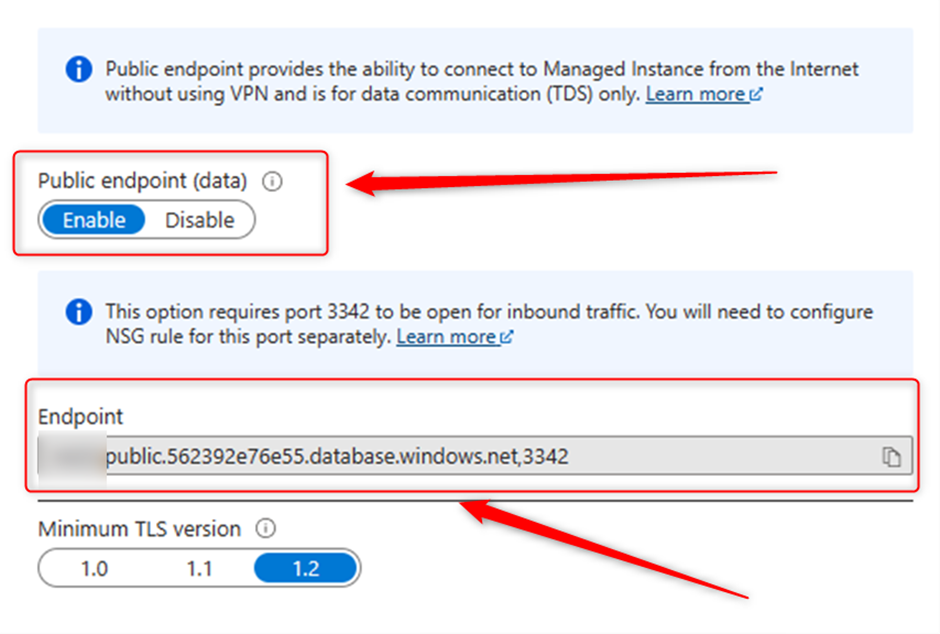
The error message shows that you try to connect to MI with “Public Endpoint” if so, from the managed instance page in the Portal go to “Networking” and make sure that public endpoint is enable. This option is disable by default. In the same page and in “Endpoint” staring it is the Server Name that you need to use in SSMS.
In this link Microsoft explains the scenarios and how they protect your data in motion.
So, if the public endpoint is enable, lets go back to “Overview” in SQL managed instance page, then click on “Virtual network / subnet”, see the below screenshot:

Then from setting blade on the left click on “subnets” then you’ll see the below page, so click on “security group”:

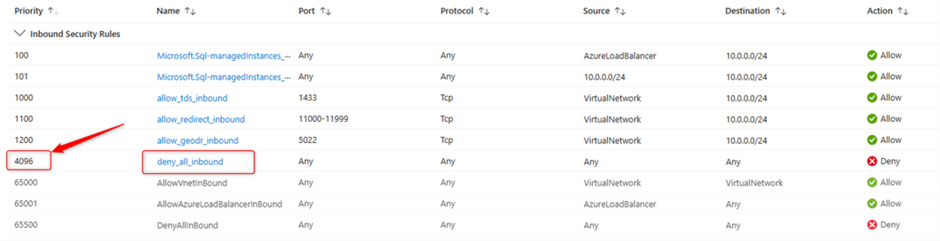
In the next page check the priority for “deny_all_inbound”, you can find it in the first column like the below screenshot:
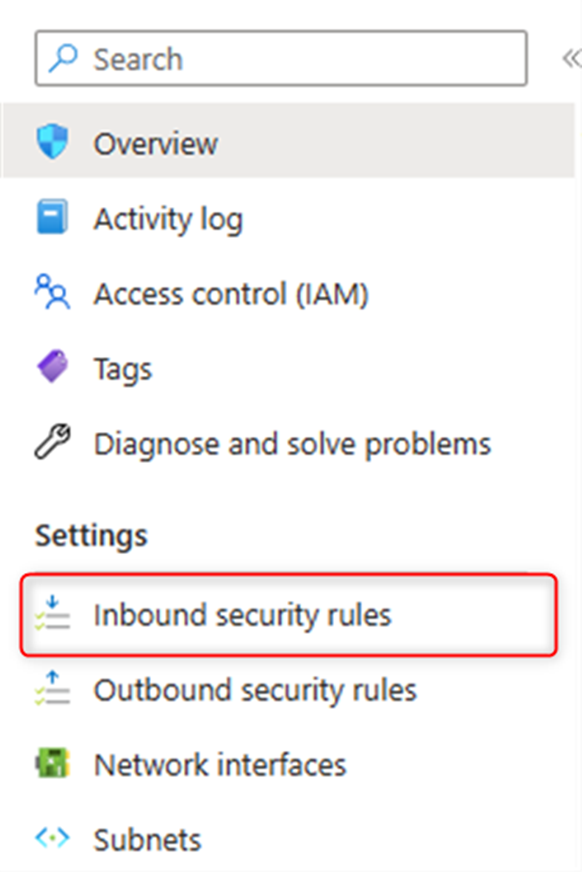
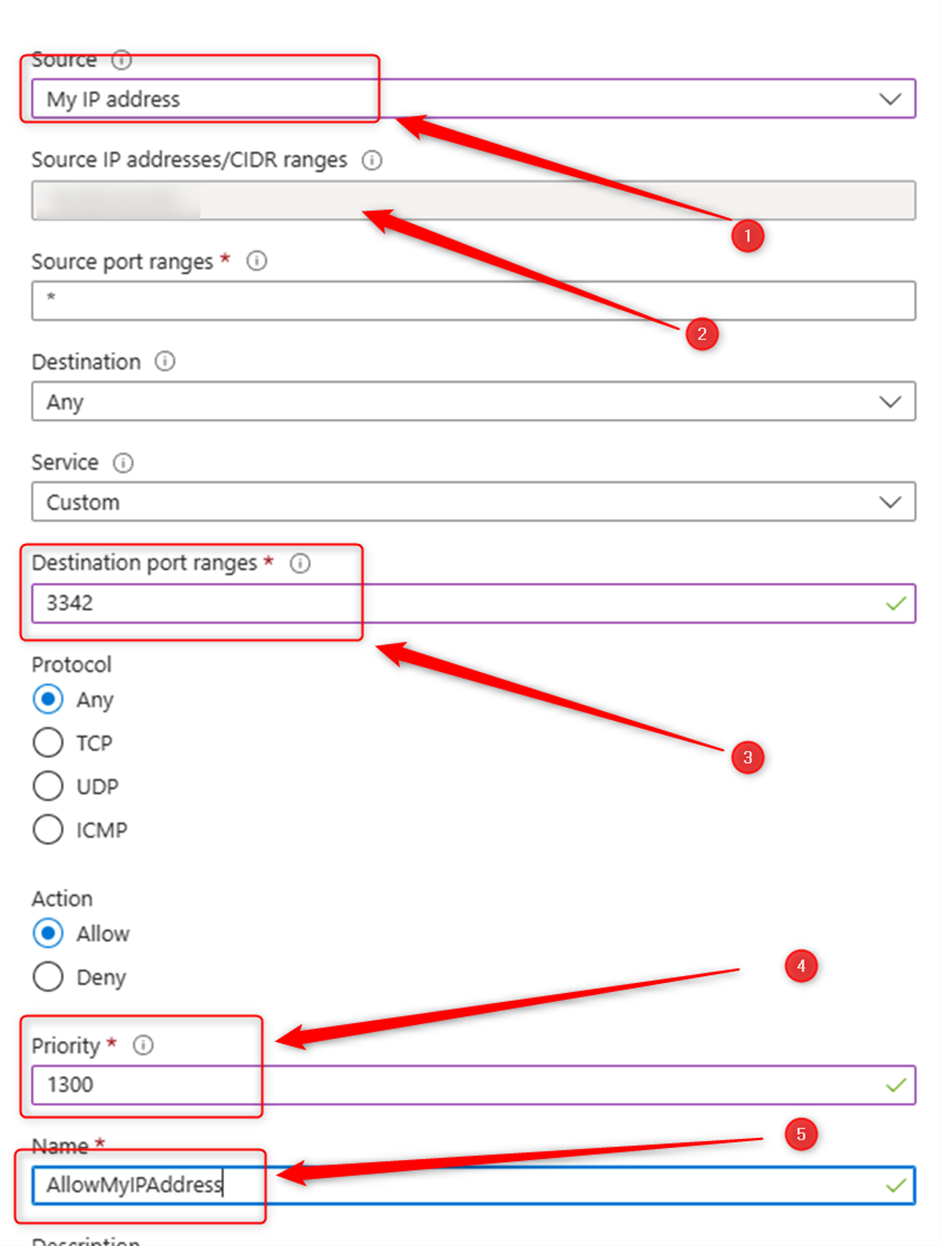
Now what you need to do, create new “inbound security rules”, in the same page and in the left blade you’ll see the option, click and in the next page “Add” new inbound rules:
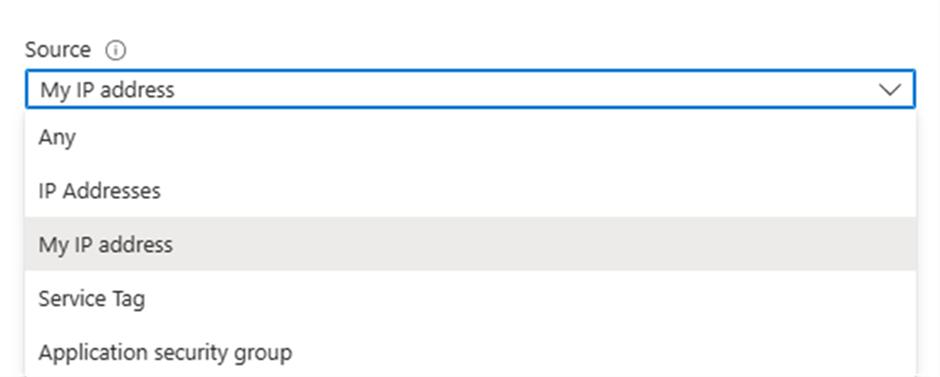
You can choose what kind of source works for you here, do you want to add the IP Addresses manually or do you want to allow from any IP address from the internet? In my case I choose “My IP Address”
See the other setting in the below screenshot, the point is the Priority must be lower that what you already check for “deny_all_inbound” in earlier. Then click on “Add”.
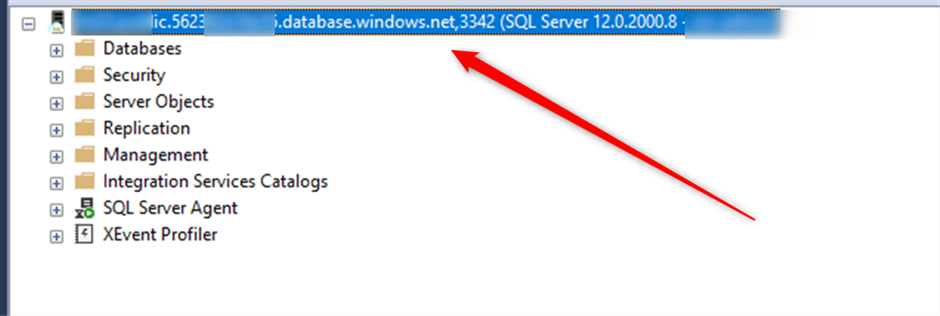
Now go back to SSMS and try to connect to MI with Public End point. This time you can connect as we configured that:
If you see official Microsoft document to Configure public endpoint in Azure SQL Managed Instance visit the below link
Configure public endpoint - Azure SQL Managed Instance | Microsoft Learn